Writing a check may seem difficult but it's actually pretty easy once you get the hang of it.
Just know you're not the only one wondering how to write a check. As banking shifts from traditional to digital, writing checks remains fairly common.
Think of things like paying rent, PTA or some other membership dues or paying bills. Paying with a paper check is an effective and free tool making payments.
While you might not write many checks, it's still an important skill to have.
How to write a check correctly
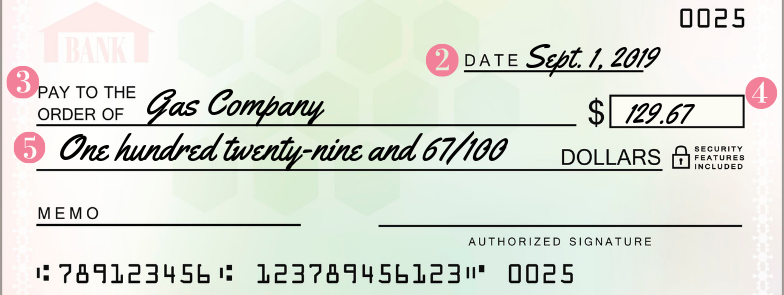
Here’s what you’ll need to include when you write a check.
- Use a pen
- Date
- Name of the person or company you’re paying
- Payment amount
- Signature
- An optional memo, noting the reason for payment
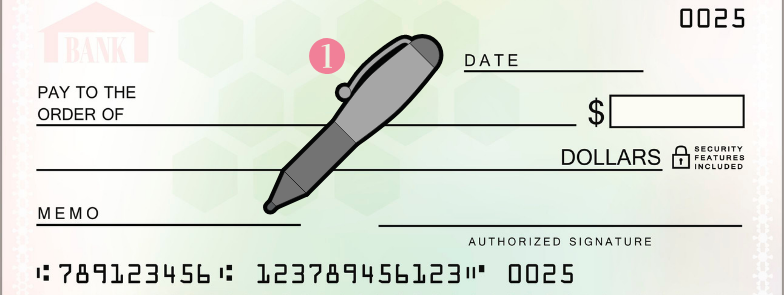
Step 1: Use a pen
Always write a check with a pen. If you use a pencil, someone can erase what you’ve written and write something different. Banks will cash the check for whatever amount is on the check; so using a pen is imperative!
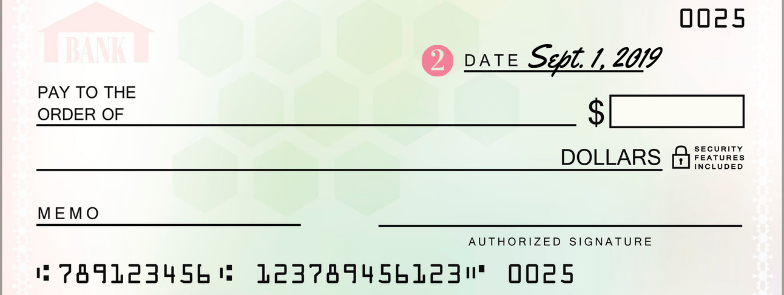
Step 2: Date the check
Write the date on the line at the top right-hand corner. The date can be written as: Month Day, Year (Sept. 01, 2019 or 9/01/19).You can also write the date: Day Month Year (01 Sept. 2019).
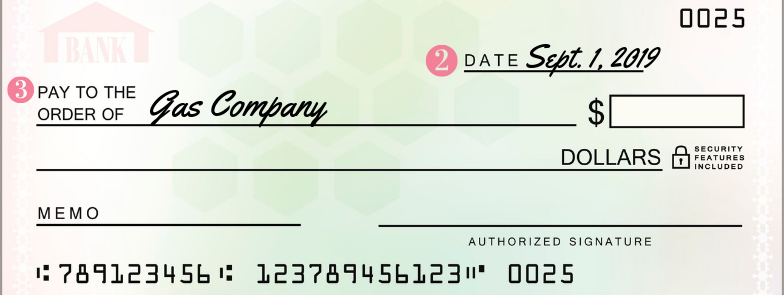
Step 3: Who do you want to pay
Write the name of the person or business you want to pay in the field labeled “Pay to the Order of.” You can also write the word “Cash” if you don’t know the person or organization’s exact name. Whatever you do, NEVER leave this section blank. Also, if you do write the payee as “Cash”, this can be risky if the check is lost or stolen. Anybody can cash or deposit a check made out to “Cash.”
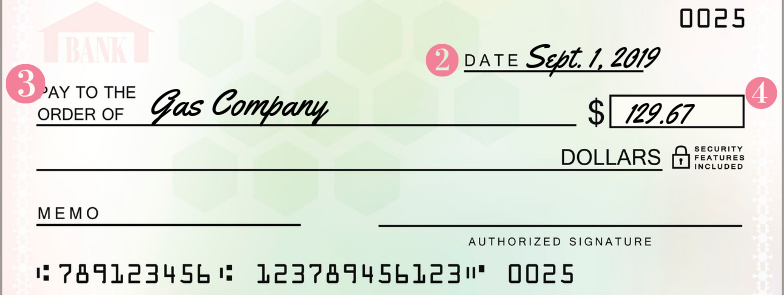
Step 4: Write the payment amount in numbers
There are two spots on a check where you write the amount you are paying. First, you’ll need to write the dollar amount numerically (for example $129.67) in the small box on the right. Be sure to write this clearly so the ATM and/or bank can accurately subtract this amount from your account.
Step 5: Write the payment amount in words
In the field below “Pay to the order of,” write out the dollar amount in words to match the numerical dollar amount. If you are paying $129.67, you can write “One hundred twenty-nine and 67/100” or “One hundred twenty-nine and sixty-seven cents – either way is correct, just as long as it's clear how much you're paying.
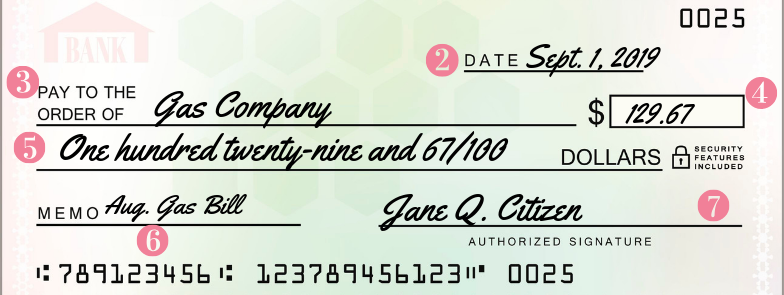
Step 6: Write a memo
Filling out “Memo” field is optional. You can use it as a reminder as to why you wrote the check. But, if you're paying a bill, the company may request you to write your account number on the check in the memo section.

Step 7: Sign the check
Sign your name on the line at the bottom right-hand corner using the signature you used when you opened the checking account. Your recipient can’t deposit the funds unless you’ve signed the check.
Steps to take after you write a check
You checkbook should come with a check register. Every time you spend money or make a deposit, keep track of this in your checkbook’s check register.
- Balance your checkbook. You should always keep track of the money you spend and deposits made to your checking account. Even when you use your debit card, make ATM withdrawals, or use online bill payment – always balance your checkbook.
- Record checks. When using a check to make a payment, record the check number found in the top right corner of the check along with the date you wrote the check and a short description of the transaction or who you wrote the check to. This helps you keep track of your checks.
- Do the math. Subtract the amount of any checks, withdrawals, payments and bank fees or add in deposits to the total amount in your account from the previous transaction.
- Reconcile your bank statement each month. When you receive your monthly bank statement, whether it comes in the mail or you view it online, take the time to balance your checking account. Any differences you notice contact your bank. You want to keep up with every penny.